


選擇正確的照明
成像資源指南第11.1部份
客戶通常會苦於成像系統中的對比度與分辨率問題,與此同時卻忽略正確照明的力量。實際上,通常改善系統的照明即可取得所需的影像品質,而無需投資購買分辨率更高的傳感器、成像鏡頭與軟體。
正確的照明對成像系統而言非常重要,不正確的照明會產生多種圖像問題。例如,高光溢出或亮斑會隱藏重要的圖像資訊,如同陰影效果一樣。此外,在測量時,陰影還會導致邊緣計算發生錯誤,從而導致測量不準確。不良的照明還會產生很低的訊噪比。尤其是不均勻的照明會導致訊噪比受損,並增大臨界邊緣擷取等任務的難度。以上所述只是正確照明對您的應用非常重要的一少部分原因。
若要在整合系統時確保最佳 照明 ,請務必了解到適合的元件所發揮的作用。每個元件都會影響傳感器上的入射光量,因而影響系統的圖像品質。成像鏡頭的光圈 (f/#) 會影響相機上的入射光量。在光圈變小時 (即f/#更高) 時,應增加照明。高倍率鏡頭通常需要更多照明,因為所檢視的較小視野反射回鏡頭的光較少。相機的最小敏感度須符合系統所需的最小光量時也很重要。此外,諸如增益、快門速度等相機設定也會影響傳感器的敏感度。
| Table 1: Key Photometric Units | |
|---|---|
| 1 footcandle | = 1 lumen/ft2 |
| 1 footcandle | = 10.764 meter candles |
| 1 footcandle | = 10.764 lux |
| 1 candle | = 1 lumen/steradian |
| 1 candle | = 3.142 x 10⁻⁴ Lambert |
| 1 Lambert | = 2.054 candle/in2 |
| 1 lux | = meter candle |
| 1 lux | = 0.0929 footcandle |
| 1 meter candle | = 1 lumen/m2 |
The light intensity for our illumination products is typically specified in terms of footcandles (English unit). Lux, the SI unit equivalent, can be related to footcandles as follows: 1 lux = 0.0929 footcandle.
| Table 2: Illumination Comparison | ||
|---|---|---|
| Application Requirement | Object Under Inspection | Suggested Type of Illumination |
| Reduction of specularity | Shiny object | Diffuse front, diffuse axial, polarizing |
| Even illumination of object | Any type of object | Diffuse front, diffuse axial, ring light |
| Highlight surface defects or topology | Nearly flat (2-D) object | Single directional, structured light |
| Highlight texture of object with shadows | Any type of object | Directional, structured light |
| Reduce shadows | Object with protrusions, 3-D object | Diffuse front, diffuse axial, ring light |
| Highlight defects within object | Transparent object | Darkfield |
| Silhouetting object | Any type of object | Backlighting |
| 3-D shape profiling of object | Object with protrusions, 3-D object | Structured light |
照明類型
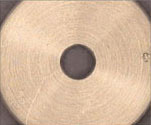
Since proper illumination is often the determining factor between a system's success and failure, many specific products and techniques have been developed to overcome the most common lighting obstacles. The target used throughout this section was developed to demonstrate the strengths and weaknesses of these various lighting schemes for a variety of object features. The grooves, colors, surface deformations, and specular areas on the target represent some of the common trouble areas that may demand special attention in actual applications.

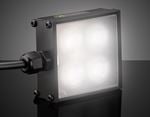
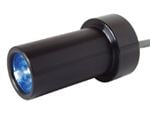
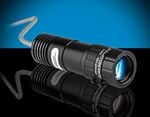
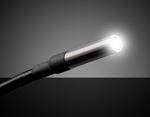
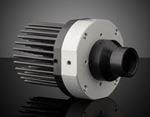
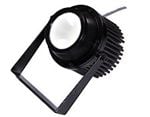
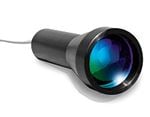
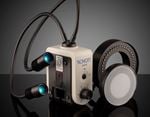
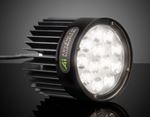
| 定向照明 – 從一或多個光源進行點光源照明。可使用鏡頭進行集中照明或分散照明。左側的圖像還使用了偏振濾光片以減少眩光。 | |
| 優點 | 明亮, 靈活, 適應環境, 均勻。 |
| 缺點 | 陰影和眩光。 |
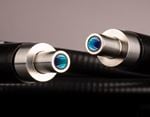
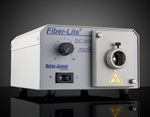
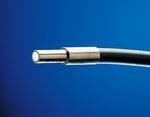
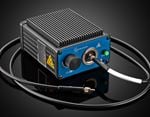
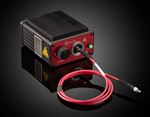
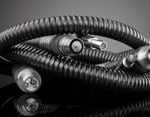
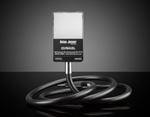
| 使用的產品 | 光纖導光設備, 聚焦組件, LED聚光燈。 |
| 應用 | 對不光滑及平直的物件進行檢測與測斜向照明量。 |
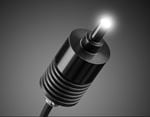
| 斜向照明 – 點光源照明,與定向照明類似,只是以銳角入射。 | |
| 優點 | 展示表面結構和改善物件拓樸的顯示效果。 |
| 缺點 | 亮點和極端陰影。 |
| 使用的產品 | 光纖導光設備, 聚焦組件, LED聚光燈。 |
| 應用 | 識別深度物件的缺陷,檢查不透明物件的精整度。 |

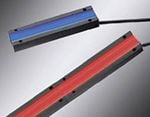
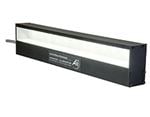
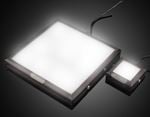
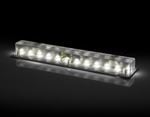
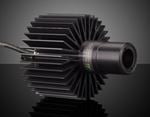
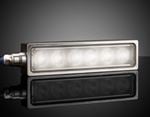
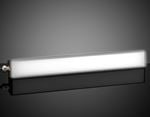
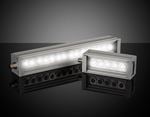
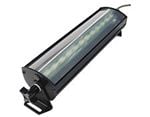
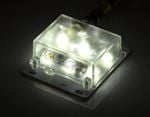
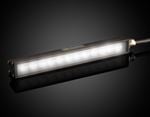
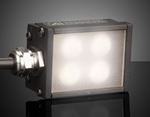
| 散射照明 – 來自擴展光源的散射、均勻的光。 | |
| 優點 | 減少眩光和提供均勻照明。 |
| 缺點 | 大(很難適合有限的空間),表面特徵不太明顯。 |
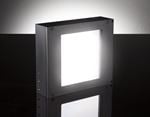
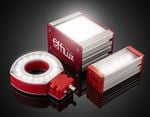
| 使用的產品 | 漫射LED照明燈和LED線性燈 |
| 應用 | 非常適合具有很長工作距離的大型發光物件的成像。 |
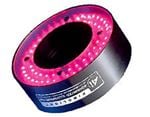
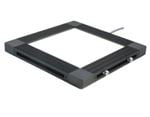
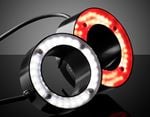
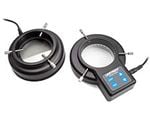
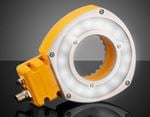
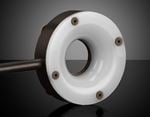
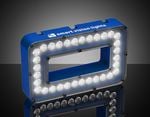
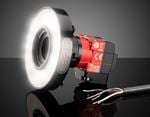
| Ring Light – Coaxial illumination that mounts directly on a lens. | |
| 優點 | 減少陰影。照明相對均勻。 |
| 缺點 | 高反射性表面會產生圓形眩光圖案。難以固定。 |
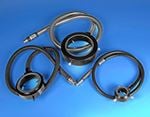
| 使用的產品 | 光纖環形導光設備; LED環形燈。 |
| 應用 | 多種檢測與測量系統(含不光滑的物件)。 |

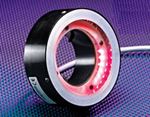
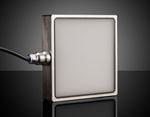
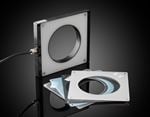
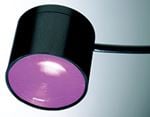
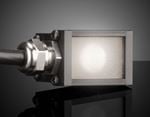
| 漫射同軸散 – 漫射光照明和鏡頭同軸設計。鏡頭視線穿過將光反射到物件上的分光鏡。照明與成像系統同軸。 | |
| 優點 | 無陰影; 均勻照明; 眩光很少。 |
| 缺點 | 通過內部分光鏡導致亮度較低。 |
| 使用的產品 | LED同軸照明燈。光纖漫射同軸轉接環。 |
| 應用 | 高反射性物件。 |
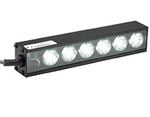
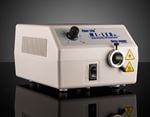
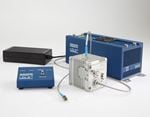
| 結構光 – 投射到物件上的圖案。通常是雷射投射線、光斑網格或圓。 | |
| 優點 | 呈現表面特徵。 |
| 缺點 | 光線過於強烈以及會由某些色彩吸收。 |
| 使用的產品 | 直線型雷射產生二極體,光纖直線型導光設備,LED投射燈 |
| 應用 | 檢測三維物件是否存在缺失的特徵。拓樸測量。 |

| 偏振光 – 一種定向照明,使用偏振光移除鏡面反射與亮點。 | |
| 優點 | 均勻照明。眩光極少。 |
| 缺點 | 通過偏振片導致亮度較低。 |
| 使用的產品 | 可附加的偏振濾光片。偏振片/偏檢片。 |
| 應用 | 測量與檢驗發光物件。 |
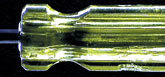
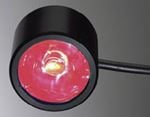
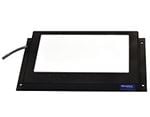
| 暗場 – 光線通過垂直於鏡頭的邊緣進入透明或半透明的物件。 | |
| 優點 | 以高對比度呈現內部與表面詳情。改善劃痕、裂縫與氣泡的顯示效果。 |
| 缺點 | 邊緣對比度不佳。不適用於不透明的物件。 |
| 使用的產品 | 光纖暗場配件,直線型導光設備,直線型雷射產生器,LED暗視場環形燈。 |
| 應用 | 玻璃與塑膠檢測。 |
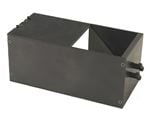
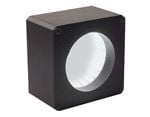
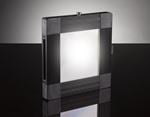
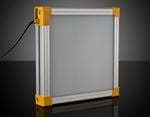
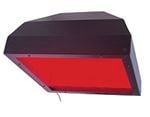
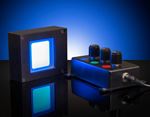
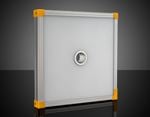
| 背光 – 自後方照亮物件。用於呈現不透明物件的剪影或用於通過透明物件的成像。 | |
| 優點 | 邊緣監測具有高對比度。 |
| 缺點 | 表面訊息遺失。 |
| 使用的產品 | 光纖背光燈。LED背光燈。 |
| 應用 | 測試板與測試圖案、邊緣監測、不透明物件的測量,以及半透明彩色物件的分類。 |
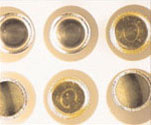
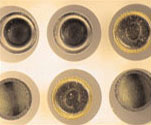
Filtering Provides Various Levels of Contrast
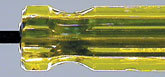
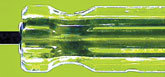
Examples illustrate darkfield and backlight illumination with assorted color filters. Note: Images taken with 10X Close Focus Zoom Lens #54-363: Field of View = 30mm, Working Distance = 200mm.
Darkfield Only Defects appear white

Darkfield with Blue Filter Defects appear blue
Darkfield and Backlight No filter used, but edge contrast improves
Darkfield without Filter and Backlight with Yellow Filter Enhances overall contrast, defects appear white in contrast to rest of field
Image Enhancement using Polarizers
A polarizer is useful for eliminating specular reflections (glare) and bringing out surface defects in an image. A polarizer can be mounted either on the light source, on the video lens, or on both depending upon the object under inspection. When two polarizers are used, one on the illumination source and one on the video lens, their polarization axes must be oriented perpendicular to each other. The following are polarization solutions to glare problems for several material types and circumstances.
Problem 1
The object is non-metallic and illumination strikes it at a sharp angle.
Solution 1
A polarizer on the lens is usually sufficient for blocking glare. (Rotate the polarizer until glare is at a minimum.) Add a polarizer in front of the light source if glare is still present.

Without Polarizers
Using Polarizers
Problem 2
The object has a metallic or shiny surface.
Solution 2
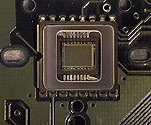
Mounting a polarizer on the light source as well as on the lens is recommended for enhancing contrast and bringing out surface details. The polarized light incident on the shiny surface will remain polarized when it's reflected. Surface defects in the metal will alter the polarization of the reflected light. Turning the polarizer on the lens so its polarization axis is perpendicular to that of the illumination source will reduce the glare and make scratches and digs in the surface visible.
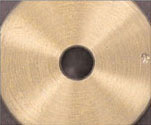
Without Polarizers
Using Polarizers
Problem 3
The object has both highly reflective and diffuse areas.
Solution 3
Using two polarizers with perpendicular orientation will eliminate hot spots in the image caused by the metallic parts. The rest of the field will be evenly illuminated due to the diffuse areas reflecting randomly polarized light to the lens.
Without Polarizers


or view regional numbers
QUOTE TOOL
enter stock numbers to begin
Copyright 2023, Edmund Optics Inc., 14F., No.83, Sec. 4, Wenxin Road, Beitun District , Taichung City 406, Taiwan (R.O.C.)
California Consumer Privacy Act (CCPA): Do Not Sell My Information